

Summary of Tasks:
Create an IAM Role
Create an EC2
Create an IAM user
Create an AWS KMS encryption key
Install the AWS Encryption CLI
Encrypt plaintext
Decrypt ciphertext
Create an IAM Role
Search the IAM service and create a role of the following configuration.


We want to access our ec2 through the session manager so assign this role a policy of "AmazonSsmManagedInstanceCore".


Create an EC2
Create an Amazon Ec2 of the following configuration.


In Advance detail, under the IAM instance profile choose "my_new_role" that we just created in the previous step.

Create an IAM user
Search the IAM service and click on the user in the left navigation pane and create a user with the following configuration.


Assign "ROSAKMSProviderPolicy" to this user.

Create an AWS KMS encryption key
In this task, you will create an AWS KMS key that you will later use to encrypt and decrypt data.
With AWS KMS, you can create and manage cryptographic keys and control their use across a wide range of AWS services and in your applications. AWS KMS is a secure and resilient service that uses hardware security modules (HSMs) that have been validated under the Federal Information Processing Standard (FIPS) Publication 140-2, or are in the process of being validated, to protect your keys.
In the console, enter KMS in the search bar, and then choose Key Management Service
Choose Create a key.
For Key type, choose Symmetric, and then choose Next. Symmetric encryption uses the same key to encrypt and decrypt data, which makes it fast and efficient to use. Asymmetric encryption uses a public key to encrypt data and a private key to decrypt information.

On the Add labels page, configure the following:
Alias: MyKMSKey Description: Key used to encrypt and decrypt data files. Choose Next

On the Define key administrative permissions page, in the Key administrator's section, search for and select the check box for user_1 that you just created and then choose Next.

On the Define key usage permissions page, in the This account section, search for and select the check box for user_1 and then choose Next.

Review the settings, and then choose Finish. Choose the link for MyKMSKey, which you just created, and copy the ARN (Amazon Resource Name) value to a text editor.
Install the AWS Encryption CLI
Connect your ec2 instance with the session manager.
In the console, enter EC2 in the search bar, and then choose EC2
In the Instances list, select the check box next for the File Server instance, and then choose Connect
Choose the Session Manager tab, and then choose Connect.

When you access your server, run the following commands.
cd ~
aws configure
When prompted, configure the following:
AWS Access Key ID: access key of the IAM user that you created
AWS Secret Access Key: secret access key of IAM user
Default region name: Copy and paste the Region in which you are working
Default output format: Press Enter.
To install the AWS Encryption CLI and set your path, run the following commands
pip3 install aws-encryption-sdk-cli
export PATH=$PATH:/home/ssm-user/.local/bin
Encrypt plaintext
In this task, you will create a text file with mock sensitive data in it. You will then use encryption to secure the file contents. Then, you will decrypt the data and view the file contents.
To create the text file, run the following commands:
touch secret1.txt secret2.txt secret3.txt
echo 'TOP SECRET 1!!!' > secret1.txt
To create a directory to output the encrypted file, run the following command:
mkdir output
Copy and paste the following command to a text editor:
keyArn=(KMS ARN)
In the text editor, replace (KMS ARN) with the AWS KMS ARN that you copied in previous steps. Run the updated command in the File Server terminal.
This command saves the ARN of an AWS KMS key in the $keyArn variable. When you encrypt by using an AWS KMS key, you can identify it by using a key ID, key ARN, alias name, or alias ARN.
To encrypt the secret1.txt file, run the following command:
aws-encryption-cli --encrypt \
                     --input secret1.txt \
                     --wrapping-keys key=$keyArn \
                     --metadata-output ~/metadata \
                     --encryption-context purpose=test \
                     --commitment-policy require-encrypt-require-decrypt \
                     --output ~/output/.
The following information describes what this command does:
The first line encrypts the file contents. The command uses the --encrypt parameter to specify the operation and the --input parameter to indicate the file to encrypt.
The --wrapping-keys parameter, and its required key attribute, tell the command to use the AWS KMS key that is represented by the key ARN.
The --metadata-output parameter is used to specify a text file for the metadata about the encryption operation.
As a best practice, the command uses the --encryption-context parameter to specify an encryption context.
The –commitment-policy parameter is used to specify that the key commitment security feature should be used to encrypt and decrypt
The value of the --output parameter, ~/output/., tells the command to write the output file to the output directory.
To determine whether the command succeeded, run the following command:
echo $?
If the command succeeded, the value of $? is 0. If the command failed, the value is nonzero.
To view the contents of the newly encrypted file, run the following command:
cd output
cat secret1.txt.encrypted
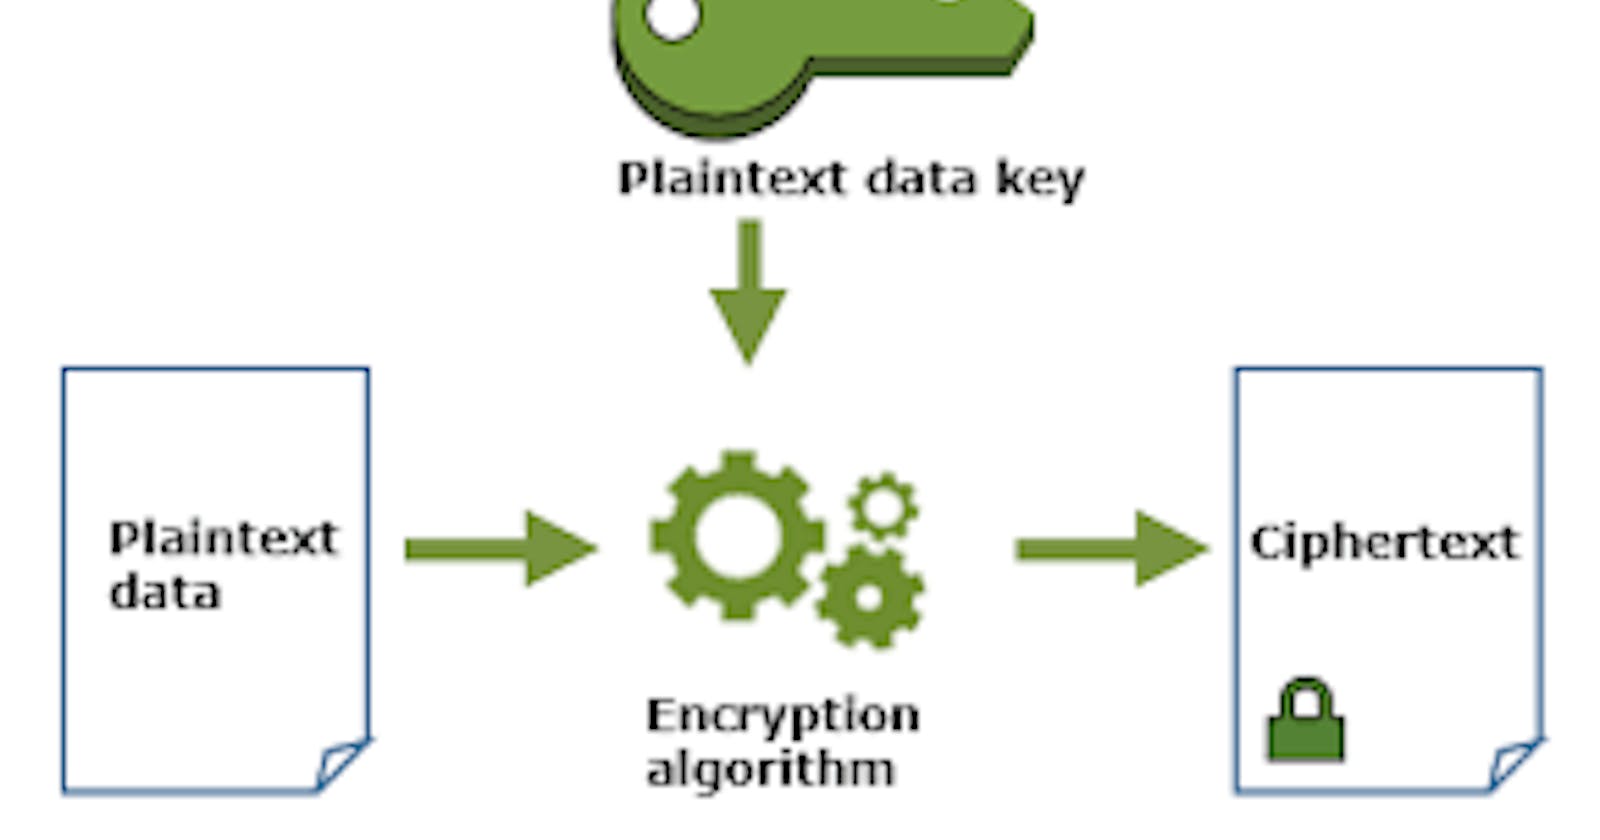
The encryption and decryption process takes data in plaintext, which is readable and understandable, and manipulates its form to create ciphertext, which is what you are now seeing.
Decrypt ciphertext
Next, you will decrypt the secret1.txt.encrypted file.
To decrypt the file, run the following commands:
aws-encryption-cli --decrypt \
                     --input secret1.txt.encrypted \
                     --wrapping-keys key=$keyArn \
                     --commitment-policy require-encrypt-require-decrypt \
                     --encryption-context purpose=test \
                     --metadata-output ~/metadata \
                     --max-encrypted-data-keys 1 \
                     --buffer \
                     --output .
To view the new file location, run the following command:
ls
The secret1.txt.encrypted.decrypted file contains the decrypted contents from the secret1.txt.encrypted file.
To view the contents of the decrypted file, run the following command:
cat secret1.txt.encrypted.decrypted
After successful decryption, you can now see the original plaintext contents of the secret1.txt.